If you have ever used photoshop or gimp then you already know the importance of layers. Like 2d designing software, 3d designing software also have the concept of layers and layer managers. In other software like Max its a bit easy to manage layers, but as you have heard blender is not so good at layer management. Even you cannot name a layer if you are using default options of blender. But the beauty of blender is addons. So don't worry I will show you the way around to do things that are not meant to be done Oooohahahahah...
Lets begin...
Lets begin...
Where you should use the layers?
Lets take a scenario where you have to make a spoon with a plate and have to place the spoon in the plate then give your objects a nice steel shader and you have to take a render of it. you can do it easily without any need of layers. But think of a big scene where you have to make whole dinner set then place it on a wodden table and that table should be placed in a room under the fan and the switch of the fan should be on and light should be off as windows are open and curtains are flowing and bla and bla and bla bla bla... Now my friend I think you should use layers. The dinner set, the table, walls, switch board, fan, curtain, everything similar should be in there own layers. so if your boss asks you to use different kind of fan or to just give two renders with different kind of fans you can easily turn the layers on and off and take render easily. And apart from these scenario there are many cases where you feel the need of layers.
Layers in Blender
There are only 20 layers provided in blender, you cannot add or remove layers. You can turn on or off the layers, switch the layers.
In the above image you can see the icons for 20 layers. If a icon is dark grey it means this layer is active and visible. If a icon has a tiny yellow dot in it that means this layer contains some objects in it. These layer icons are also available in 'Render Layer' tab under 'Scene' label in the property window. There are also Render Layers and Mask Layers, don't confuse them with Scene Layers, we will talk about that when the time come.
Switching or activating multiple layers in Blender
To switch layers in blender you can do two things given bellow.
- Click on the icon of the layer to make it active and visible and hide other layers.
- Press the corresponding shortcut button of the layers to make it active.
The shortcut key for the first 10 layers is the buttons from 0-9 above your qwerty buttons of the keyboard and for the next 10 layers you can use Sift along with 0-9.
Keep in mind Num Pad button does not belong to layers.
To activate multiple layers you have to press Shift and then click on the layer icons to make them visible and active.
Moving objects from one layer to another
In blender you can easily move objects from one layer to another. Follow the steps given bellow to move objects from one layer to another.
- Select the objects you want to move from current layer to another
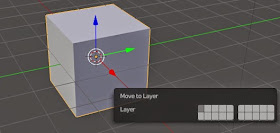
- Now press 'M' on the keyboard and click on the layer icon from the popup menu in which you want to move the objects. M is the shortcut to move selected objects from one layer to another.
Relating or Linking one object to multiple layers in Blender
- An object can be linked or related to multiple layers. When moving object after pressing M hold shift when choosing layer to move object. After this the object will be linked to the other layers to but the current layer will also have it.
- If you relate the object with multiple layers that doesn't make copies of the object but the data of the object will be linked, if you delete the object from one layer it will be deleted from all layers it was linked to.
Layer Manager in Blender
There is no inbuilt layer manager provided in the blender but they have included an Add-on for the layer management in blender. But you have to activate it to use it. To activate Layer Manager follow the steps given bellow.
- Go to the file menu and click on 'User Preferences' or press Ctrl + Alt + U
- In the user preferences window go to Add-ons tab.
- Start typing layer manager in the search box and the add-on will appear.
- Activate the add-on by turning on the check box of the add-on and then click on save user setting. and close the dialog box.
Now in the Tool Self of 3D view a new tab is added named Layers. Click on that tab and you will find your new layer manager. You can give a name to the layers, select objects of the layer by one button click, change shading mode of the objects of a layer, lock the objects of the layer etc.
If you face any problem using layer manager in blender, let me know in the comments.
If you like the post let me know through the comments and sharing the link to the blog, it encourages me to write more post. And if you want a post on a specific topic, tell me in the comments. I have to leave for now...Happy Blending..


No comments:
Post a Comment